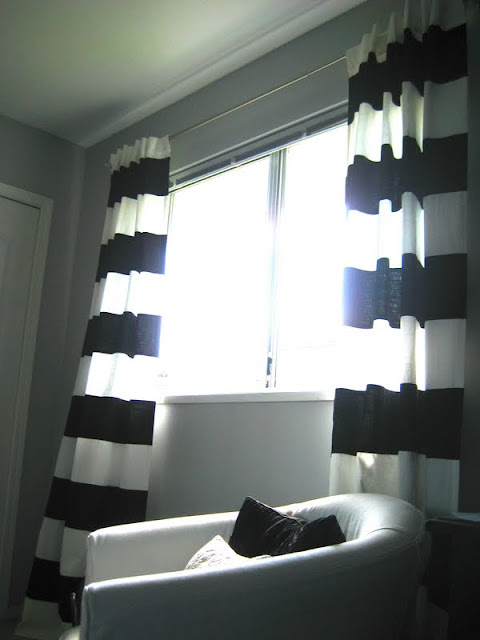
One sewing project I have been slaving over working on and finally completed was sprucing up some plain store bought drapery panels. My daughter wanted striped drapes, we searched for wide-striped fabric but after the calculating yardage, price and work involved we made these instead.
All that was required was this:
And some contrasting fabric:
Here is the how-to:
You need:
- Store bought drapery panels {I used Ritva drapes from Ikea for $39.99, I liked the weight and the header on these drapes}
- Fabric for stripes, your choice, but choose a fabric with a similar weight and weave as the drapes, I used 3 meters, it will vary, depending on how wide and how many stripes you would want
- Long ruler
- Chalk
- thread to match the fabric {or you can use contrasting thread to add some interest}
- Hand sewing needle
- Pins
- Sewing Machine
- Iron
*You could use fusible webbing if you didn't feel like sewing.
*Another option: You could line the drapes to really give them a custom look, but I chose not to.
How to:
Hem the drapes following the directions on the package.
First determine how wide you want your stripes and how many would be needed on your drapery panel. My finished length was 86". I chose 7"wide stripes and determined I needed to cut 6 for each panel.
Lay out your fabric and measure strips 1" wider and 2" longer that your desired width and length. This is to allow for hems.
My drapes were 57" wide and I wanted 7" high stripes. Using chalk, I measured out 12 - 8" X 59" strips.
Using a quilting square or a dressmaker right angle ruler works well to get even strips.
Cut out strips and iron a half inch hem on one side running the length of the strip.
Then iron a half inch hem on the opposite side, using a measuring tape to ensure the strip is 7"wide after the edges are ironed. Leave the ends un-hemmed.
Start pinning down the strips. I determined my strips would begin 4"from the top, that way I ended up with even spaces of black and white down to the bottom hem.
Continue this down the drape, spacing 7" between the strips. Leave the edges overhanging.
Topstitch the edges of the strips with your sewing machine, leaving the ends free.
Iron the edges over to the back and pin.
Slip stitch the edge hems. Press edges with iron.
Hang up!
Now I am working on sewing working Roman blinds for all three kids' rooms. The sewing part has been easy, but I am having a hard time finding parts in the right widths. I can't find wooden dowels {these help the folds} wider than 48" without having custom cut dowels from the fabric store. That brings up the price dramatically.
I need 57" wide, anyone have any tips?
{No, I don't like Little Green Notebook's way of making Roman blinds}
XO Barbara


