Showing posts with label DIY. Show all posts

Tuesday, May 17, 2011

I *Heart* Chiang Mai Dragon


I am in love with the Chiang Mai Dragon print from Schumacher. I'll take it in any colour. The colours and patterns are so rich and luxurious.

I don't care it is everywhere.

 I *heart* it.

When I went shopping with two blog buddies to a fabric wholesaler, I was thrilled when Karla, managed to snag me not only one but TWO samples! If you recall, there were grommets in the fabric. I guess they thought that would deter anyone from making anything with it. They didn't know who they were dealing with when they gave it to me. 

A grommet? I can deal with that.


Scissors were involved...


After a little snipping, patchwork and sumptuous trim, one pillow is finished.


I even sewed an invisible zipper 
{Please, hold the applause}


This fabulous pillow cost this frugal gal very little. 

While Chiang Mai Dragon can run about $250/yard {you heard me right}, this piece cost me
NOTHING.

I bought a yard of linen to match for $15/yd {only used half a yard = $7.50}}

Invisible zipper: $1.50 

Navy velvet ribbon: $4.00

Ikea pillow insert: $6.00

Total cost: $19.00

Hubby will like that :)

Here is a peek at another pillow I slaved worked on:


Friday, April 15, 2011

Black and White Striped Armchair : The Reveal


Remember the sneak peek of my chair I gave you last week

It is finished. Yay! 

Took me forever. 

Bought the chair for $50 in November and it is now April. 


Yup, took me forever.

Here is a quick rundown of what was involved. 

Removed the ugly vinyl that was nailed on with a gazillion 1" nails and nail heads. 


That took forever, patience was needed. 

Then removed second layer of dusty fabric that was nailed onto the frame with hand forged nails. Those took forever to remove.

Can I say that again? 
Forever.


Achy hands set in. Took a break. Cursed a bit. 


Found straw stuffing under the upper part of the chair. Sneezed a bit. 

Stapled fabric onto chair. This was by trial and error. Cursed some more. 


Then nailed in 223 nail heads. 


Don't ask me for a tutorial, I might throw the chair at you.

But......

I am happy. The chair is done. 

Want to see?

Before:


After:


Will I ever try something like this again?

 Not sure, after all that work I don't think I would hesitate paying a professional.

But my total cost might make me try again.
Chair: $50
Fabric {from Ikea}: 2 m @ $7.99m = $16
250 nail heads @ $ 0.8 ea = $20

Grand total: $86

 Have a wonderful weekend all my lovely readers!

 I finally finished my painting project that I have given you peeks of on my Facebook page. Hoping to set it up this weekend. 

What are you up to?

Tuesday, April 5, 2011

Re-vamped Chair

Remember the saga of the one chair I was painting?


First the paint bubbled.


Then the black and white fabric looked "off"


After a few coats of black spray paint, it now looks fabulous!


I managed to get some quick shots on a rare sunny day.

If you were looking forward to the next part in Painting Furniture 101, I hope to have it up towards the end of the week. Mother Nature is not cooperating, we actually had sleet yesterday! Too cold for my latest painting project where I was planning to photograph and share the nitty gritty in painting! 

Thanks for all who stopped by to read my latest "So Canadian, eh?" interview with Margot Austin, it was such a pleasure to get to know the person behind all those amazing design stories at Style at Home. 

I have so many more amazing Canadians lined up in the next coming weeks, some who are very well known, make sure you stop by!

XO Barbara

Tuesday, March 29, 2011

End Table Reveal


This is the day you have all been waiting for with bated breath, the reveal of my latest painting endeavour.

Da-da-da-da.......

A little leg....


Let's look at the before:


From 25 bucks....

to 

lookin' like a million!


The headboard is the second diamond tufted headboard I made. Want to make one for yourself?
 You can follow the step-by-step here.

The bedding is changing and I am not sure about the shade/lamp combo, it has bothered me for a while. Can't quite put my finger on what is wrong.

Still need to do the final touches on the room 
{and finish the other daughter's room as well , he-he, that one has been taking me - gulp- almost a year}.

One a side note: 

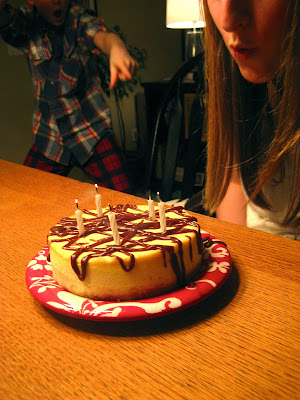
J, who loves her new end table celebrated her 15th birthday yesterday.
Yup, my baby girl is 15!


{yes, that is my son in his plaid shirt- plaid pj combo, such a stylin' guy}

More exciting news: 

I have THREE superstar Canadian designers who have agreed to participate in my "So Canadian, eh?" series!

Stay tuned!

Wednesday, February 23, 2011

{something I just whipped up}


 A few weeks back I helped my sister finally finish her duvet cover for her super king duvet. We made it out of two king flat sheets and added a insert of fabric to make it wider. She bought some gorgeous crisp cotton from Restoration Hardware at a local fabric store for the insert panel. I then stitched white satin ribbon along the seam of the insert to add some visual interest.

 But I was in such a hurry I didn't take any photos. Sad...I know.....I'll have to photograph her room when it's all put together.

But, I did take pictures of this.......


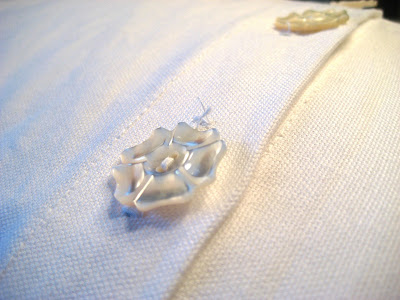
As a surprise I stitched up this monogrammed pillow for her bed. It was easy to put the pillow together, making an envelope enclosure that I added buttonholes and buttons to jazz up the back.


These buttons are special as my mom let me rifle through my grandma's sewing box and let me take a few of her antique buttons. She passed away in September and I though it would be special to use them for the pillow for my sister.


The hardest and most challenging part was the monogram. 

I have seen monogrammed pillows all over blogland and wanted to try it myself.

 How hard can it be?


Well.....it took me about an hour fiddling on the computer, searching the internet for help, to create a reverse image of the initial. 

Frustrating to say the least.

 Everyone makes it seem so easy, except I had no "reverse image" option in Word for my Mac. 

I will let you in on my secret-took-me-forever-discovery.....

You enlarge your letter and then save it as a JPEG file, which can be flipped! Easy, peasy.

Then print out the reversed image on transfer paper.

*I used Avery brand Iron-on T-shirt transfer paper for ink jet printers, purchased at Staples.

Iron it onto the pillow, following the directions.
 Easy? No....

This is where my project went wrong.

Here are a few tips I learned the hard way:
 Don't sew your whole pillow together and then iron on the letters, as you might end up doing this:


Yes, I scorched the pillow by holding down the iron for too long! Argh!
The iron needs to keep moving over the back of the paper, don't let it sit there or the heat will scorch your fabric.

I had to rip stitch apart the whole pillow, cut out another rectangle, re-print another letter and start over.

Lucky for me I had extra fabric. After ironing on the letter AND THEN sewing together the pillow, it is now happily sitting on my sister's bed!


XO Barbara

Thursday, February 3, 2011

{thrift store chair: update}


Here is the status of my thrift store chair I shared with you over a week ago.

The bottom seat is finally recovered but not without a few glitches along the way. 


I had the whole seat recovered and then I watched some very useful videos sent to me by:


Marriah said...

It looks like you might have already started on your chair, but I've recently taken on my own chair re-upholstery project. I have deconstructed it to find broken old springs in the seat. In my search to find replacement springs, I found this website with wonderful supplies that seem to be very competitive price-wise. The gem though is the links to the youtube videos of the owner (45 years in the upholstery business)of each step in the process -- i think 13 videos in all. Here's the link: http://www.diyupholsterysupply.com/how-to-upholster-chair.html 
Good luck!

After watching the first 2 videos {very informative} I realized - I forgot to put a layer of Dacron {batting} between the foam and the fabric! 

So out went all the staples and I cut a piece of batting that I went out to buy, layered it under my fabric piece and stapled it back on.

Much better!
The batting gives the fabric a way smoother finish, a step not to be missed.
Now onto the back piece, that will be really tricky. 

My dilemma: 
I would like to finish the bottom off with some nail heads, should I just use a few like this photo? 

Or run nailhead trim along the whole bottom edge?

Don't forget you have until Sunday to enter my giveaway for a $45 gift certificate to CSN!

Wednesday, January 26, 2011

{i'm featured: diy club life and home ezine}


Check out the latest issue chock full of organizational and DIY ideas!


{I'm on page 56}


Friday, December 31, 2010

{my favourite projects of 2010}

Hard to believe another year has flown by!

 It has been an exciting year - I have met many wonderful friends through blogging and have had some of my projects featured in some amazing blogs and websites.  

A big thank-you to all my followers and friends that read my humble blog, it makes my day when you leave such encouraging comments. 

There will also be a few changes in the new year at hodge:podge, my new blog header is getting some final tweaks and should be up in the next week or so and I plan on launching a new series, so Canadian, eh? where I feature and/or interview various Canadian bloggers, designers, artists, and etsy sellers. I hope to have the first feature in a few weeks! Stay tuned....

But....

We can't end 2010 without re-visiting some of my favourite DIY projects from this past year.


{January}


 Taking a thrift store lamp from gram to glam....


{February}

Recently this tutorial was featured on Adventures in Renovating a Brooklyn Limestone.


{March}

Not much happened as I spent 2 weeks in Hawaii with our eldest daughter's track team. 

I know life is rough.


{April}


{May}

Monogrammed a small chair just for my niece.


and had the pleasure of getting together with local design bloggers at the quaint Little White House Cafe in Fort Langley


{June}

Transformed a junkstore mirror with a little spray paint.


{August}

Made subway/eyechart art for my son's room.


{September}

Created an art wall in my eldest daughter's room.


{October}


{November}


{December}

No exciting DIY projects but instead had a few projects featured on various blogs and
enjoyed getting our home ready for Christmas.


Wishing you all a prosperous and blessed New Year!

and
and