Showing posts with label chairs. Show all posts

Friday, April 15, 2011

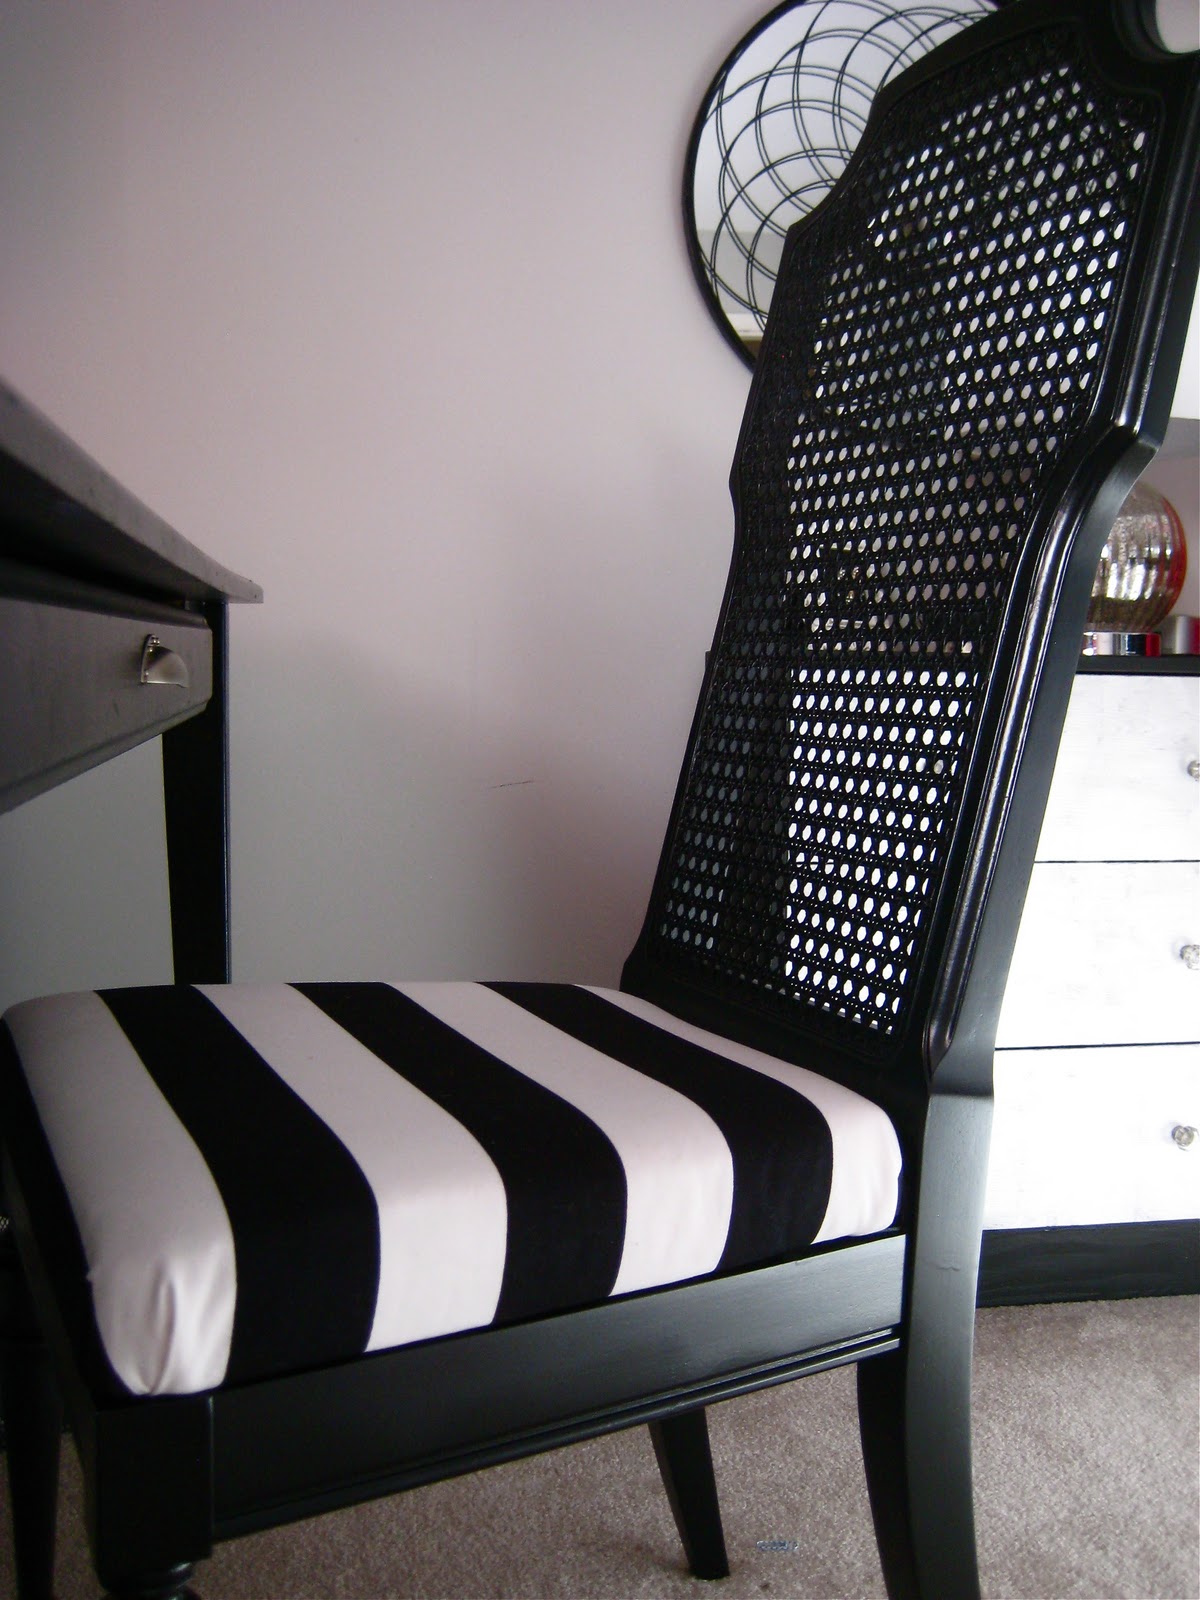
Black and White Striped Armchair : The Reveal


Remember the sneak peek of my chair I gave you last week

It is finished. Yay! 

Took me forever. 

Bought the chair for $50 in November and it is now April. 


Yup, took me forever.

Here is a quick rundown of what was involved. 

Removed the ugly vinyl that was nailed on with a gazillion 1" nails and nail heads. 


That took forever, patience was needed. 

Then removed second layer of dusty fabric that was nailed onto the frame with hand forged nails. Those took forever to remove.

Can I say that again? 
Forever.


Achy hands set in. Took a break. Cursed a bit. 


Found straw stuffing under the upper part of the chair. Sneezed a bit. 

Stapled fabric onto chair. This was by trial and error. Cursed some more. 


Then nailed in 223 nail heads. 


Don't ask me for a tutorial, I might throw the chair at you.

But......

I am happy. The chair is done. 

Want to see?

Before:


After:


Will I ever try something like this again?

 Not sure, after all that work I don't think I would hesitate paying a professional.

But my total cost might make me try again.
Chair: $50
Fabric {from Ikea}: 2 m @ $7.99m = $16
250 nail heads @ $ 0.8 ea = $20

Grand total: $86

 Have a wonderful weekend all my lovely readers!

 I finally finished my painting project that I have given you peeks of on my Facebook page. Hoping to set it up this weekend. 

What are you up to?

Friday, April 8, 2011

Sneak Peek


I am off today to Victoria, British Columbia for J's soccer tournament.


 So while the paint is curing this weekend on my recent thrift store find... 

{ for "behind-the-scenes" peeks you can follow my Facebook page}

I am giving you a sneak peek of a LONG overdue project that is finally finished.

Quick overview.

Found this:


Removed a gazillion nails and staples...

Found straw as the stuffing..


Stapled on this:


And hammered in these:


Have a wonderful weekend!


Make sure you come back Sunday for my latest crazy talented "So Canadian, eh?"!

XO Barbara

Tuesday, April 5, 2011

Re-vamped Chair

Remember the saga of the one chair I was painting?


First the paint bubbled.


Then the black and white fabric looked "off"


After a few coats of black spray paint, it now looks fabulous!


I managed to get some quick shots on a rare sunny day.

If you were looking forward to the next part in Painting Furniture 101, I hope to have it up towards the end of the week. Mother Nature is not cooperating, we actually had sleet yesterday! Too cold for my latest painting project where I was planning to photograph and share the nitty gritty in painting! 

Thanks for all who stopped by to read my latest "So Canadian, eh?" interview with Margot Austin, it was such a pleasure to get to know the person behind all those amazing design stories at Style at Home. 

I have so many more amazing Canadians lined up in the next coming weeks, some who are very well known, make sure you stop by!

XO Barbara

Friday, March 25, 2011

Painting Party


Yesterday while two of our children went skiing to Whistler with their dad 
and the other was at her lifeguard training, I decided to have a painting party!


Yes, I decided I liked the striped fabric {it will match the drapes} and with a few coats of Canyon Black by Rustoleum it now looks amazing.


Next, this end table got a coat of paint after the primer dried.


Finally, I painted our master bathroom, bye-bye peach.

Not sure I like the white I chose, but I am tired of painting. I think I'll live with it.
Photos are on the other camera, will have to show you next week when the room is all gussied up.

Anyone else working on painting projects?

Don't forget to stop by on Sunday when I feature another "So Canadian, eh?"

XO Barbara

Wednesday, March 16, 2011

{fun fabric finds}


Remember a week ago I shared with you my chair painting woes?


Well, the chairs are sanded, re-primed and painted.
I am pleased with how they turned out. I upholstered one of the chairs with the black and white striped fabric I bought from Ikea but am not sure I like it. Since the paint is a crisp white, it makes the white in the fabric look "dirty".

My dilemma is:  do I repaint the chairs with a more creamy white {but spray paint colour selections are limited} or do I recover the seat with a different fabric or repaint the chair black?

{before}

{after}


It is hard to tell in the photos, {dark and rainy out} but do you see how the white in the stripe is a bit more yellow?
 Now sure I like it, what do you think?
My daughter suggested I cover the seat in the same fabric as her headboard, hmmm...


Or maybe a different fabric? 

After a bit of searching, I came across Premier Prints that carries the most amazing fabrics AND you can't beat the price of $9.99/yd for most fabrics!

Loving this:


{my favourite}

{I am a sucker for paisley}


Since I have two chairs, one has gone in the eldest daughter's room as you can see above. The other will go in her sister's room BUT she was adamant she didn't want black and white fabric on the seats. She wants more colour injected in her room. Inspired by her painting {the painting on the right in photo}, which was inspired by some Amy Butler fabric I had in my fabric bin, we are going to spice up her room with turquoise, yellow and brown.


Adding colourful turquoise and yellow accents will spice up the black furniture, white diamond tufted headboard {yes, photos are coming - just waiting for this never ending rain to stop!} and her African Violet walls.


Here are some fantastic Amy Butler fabrics I have found:


Now the fun part, choosing the right fabric and sewing!


Also CSN has once again offered me a chance to review a product, which I am excited to do. CSN is an online store that carries everything from pendant lighting to the kitchen sink. Looking forward to shopping!


XO Barbara

Thursday, February 3, 2011

{thrift store chair: update}


Here is the status of my thrift store chair I shared with you over a week ago.

The bottom seat is finally recovered but not without a few glitches along the way. 


I had the whole seat recovered and then I watched some very useful videos sent to me by:


Marriah said...

It looks like you might have already started on your chair, but I've recently taken on my own chair re-upholstery project. I have deconstructed it to find broken old springs in the seat. In my search to find replacement springs, I found this website with wonderful supplies that seem to be very competitive price-wise. The gem though is the links to the youtube videos of the owner (45 years in the upholstery business)of each step in the process -- i think 13 videos in all. Here's the link: http://www.diyupholsterysupply.com/how-to-upholster-chair.html 
Good luck!

After watching the first 2 videos {very informative} I realized - I forgot to put a layer of Dacron {batting} between the foam and the fabric! 

So out went all the staples and I cut a piece of batting that I went out to buy, layered it under my fabric piece and stapled it back on.

Much better!
The batting gives the fabric a way smoother finish, a step not to be missed.
Now onto the back piece, that will be really tricky. 

My dilemma: 
I would like to finish the bottom off with some nail heads, should I just use a few like this photo? 

Or run nailhead trim along the whole bottom edge?

Don't forget you have until Sunday to enter my giveaway for a $45 gift certificate to CSN!