Showing posts with label before and after. Show all posts

Friday, April 15, 2011

Black and White Striped Armchair : The Reveal


Remember the sneak peek of my chair I gave you last week

It is finished. Yay! 

Took me forever. 

Bought the chair for $50 in November and it is now April. 


Yup, took me forever.

Here is a quick rundown of what was involved. 

Removed the ugly vinyl that was nailed on with a gazillion 1" nails and nail heads. 


That took forever, patience was needed. 

Then removed second layer of dusty fabric that was nailed onto the frame with hand forged nails. Those took forever to remove.

Can I say that again? 
Forever.


Achy hands set in. Took a break. Cursed a bit. 


Found straw stuffing under the upper part of the chair. Sneezed a bit. 

Stapled fabric onto chair. This was by trial and error. Cursed some more. 


Then nailed in 223 nail heads. 


Don't ask me for a tutorial, I might throw the chair at you.

But......

I am happy. The chair is done. 

Want to see?

Before:


After:


Will I ever try something like this again?

 Not sure, after all that work I don't think I would hesitate paying a professional.

But my total cost might make me try again.
Chair: $50
Fabric {from Ikea}: 2 m @ $7.99m = $16
250 nail heads @ $ 0.8 ea = $20

Grand total: $86

 Have a wonderful weekend all my lovely readers!

 I finally finished my painting project that I have given you peeks of on my Facebook page. Hoping to set it up this weekend. 

What are you up to?

Wednesday, April 13, 2011

The Tale of Two Tables


*This blog post is brought to you buy two thrifting pals, who never leave a thrift shop empty handed! 
If you want to read the other half of the story you can read it here.

Once upon a time in a land far, far away, where the rain falls freely, giant trees tower above, snow covered peaks loom and the ocean waves crash upon the shore...

Two blogging and thrifting pals, Barbara from hodge:podge and Carol from The Design Pages, were on the hunt for an end table for their lovely daughters. While on one of their thriftting excursions they hunted high and low for the perfect table, one that had good "bones".  But alas, they came away without finding that perfect table {but they found other treasures, that is a another story for another day}

Sniff....

The one friend decided to search Craigslist to see what she could find. One stormy evening she stumbled across a bedroom set that had the perfect pair of end tables. She emailed the seller and asked if they would be willing to separate the set. The seller said "yes". Quickly,  the ever-so-excited-friend emailed the other friend a link and asked if she was interested. $50 bucks for the pair! 
"Why yes!!!" she said, "how perfect!"

The thrifty gals took their tables home and worked their magic on them, transforming them from their 70's lacquered horror to glamourous side tables fit for their princesses.

They went from this:


To this:


Carol  painted her table with a glossy black paint and silver leafed the top and handles to create a table fit for a queen.

Want to know her costs? And how she did it? Visit her blog to find out more.

Want to know how I worked my magic? 


My costs:

Table: $25
Paint: 1 quart Behr indoor latex in satin finish, $18
{colour matched to Benjamin Moore's Spectra Blue}
Primer: Benjamin Moore's oil-based primer, already had on hand {cost $18}
Sealant: Diamond Finish Sealant in satin by Varathane, already had on hand {$14}
Handles were left as-is

Total cost: $34

How I did it:

Using a power sander I sanded the surface of the table as the finish was quite damaged. Then I painted on a coat of oil-based primer with a foam roller for a nice smooth finish and using a foam brush for the crevices. Next, I painted the table with 2 coats of the Behr paint, using a foam roller and good quality paint brush.  Finally, using a foam brush I painted on 3 coats of the Varathane sealant.
Screw back on the handles and 

voila!


And this table lived happily ever after.

The End

xo Barbara

Tuesday, April 5, 2011

Re-vamped Chair

Remember the saga of the one chair I was painting?


First the paint bubbled.


Then the black and white fabric looked "off"


After a few coats of black spray paint, it now looks fabulous!


I managed to get some quick shots on a rare sunny day.

If you were looking forward to the next part in Painting Furniture 101, I hope to have it up towards the end of the week. Mother Nature is not cooperating, we actually had sleet yesterday! Too cold for my latest painting project where I was planning to photograph and share the nitty gritty in painting! 

Thanks for all who stopped by to read my latest "So Canadian, eh?" interview with Margot Austin, it was such a pleasure to get to know the person behind all those amazing design stories at Style at Home. 

I have so many more amazing Canadians lined up in the next coming weeks, some who are very well known, make sure you stop by!

XO Barbara

Tuesday, March 29, 2011

End Table Reveal


This is the day you have all been waiting for with bated breath, the reveal of my latest painting endeavour.

Da-da-da-da.......

A little leg....


Let's look at the before:


From 25 bucks....

to 

lookin' like a million!


The headboard is the second diamond tufted headboard I made. Want to make one for yourself?
 You can follow the step-by-step here.

The bedding is changing and I am not sure about the shade/lamp combo, it has bothered me for a while. Can't quite put my finger on what is wrong.

Still need to do the final touches on the room 
{and finish the other daughter's room as well , he-he, that one has been taking me - gulp- almost a year}.

One a side note: 

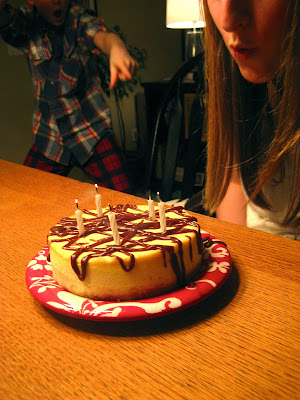
J, who loves her new end table celebrated her 15th birthday yesterday.
Yup, my baby girl is 15!


{yes, that is my son in his plaid shirt- plaid pj combo, such a stylin' guy}

More exciting news: 

I have THREE superstar Canadian designers who have agreed to participate in my "So Canadian, eh?" series!

Stay tuned!

Sunday, December 5, 2010

{i'm featured: censational girl}


My Ikea Rast makeover is being featured at Centsational Girl! 

I am flattered to have my simple yet {in my opinion} stunning dresser makeover to be featured on the Queen of DIY's website!


Check it out {and other FABULOUS ideas/projects/makeover that Kate comes up with}

Thanks so much Kate!

Friday, December 3, 2010

{how-to make a silver leaf dresser: an ikea rast hack}

Do you want to know how to take this:


To this?


Re-inventing the Ikea rast dresser was VERY easy and relatively inexpensive. It is constructed of solid wood making it a great surface to paint, wallpaper, stain, etc.

Because I am frugal and love to DIY, I decided to silver leaf the drawer fronts of the dresser and change the knobs to give the Ikea Rast dresser the glamour treatment. 

This project was easy, as silver leaf is very easy to work with. Silver leaf is very delicate and light but forgiving, the first few tries will be tricky but you'll get the hang of it quite quickly. It is easy to patch up and cover gaps with bits of silver leaf. I find it amazing how it all blends together. What I found was that silver leafing wood with a grain was a bit more challenging to get a seamless finish than on a smooth surface such as my lamp.


Materials needed:

Rast dresser from Ikea {I paid $29 but it is showing up online as $39 - must of been my lucky day}
Black paint {or colour of your choosing} I used Benjamin Moore's Aura paint in black
Silver leaf  {I used a package of 24 sheets and leftover leaf from my lamp project. I would recommend  2 packages of 24 from Michaels}
Gilding adhesive size
Crystal knobs {or knobs of your choice}
Sanding block
Varathane
Paint brush for the paint and wipe-on poly
Smaller paint brush for the size
Fluffy dry paint brush to smooth and dust off silver leaf

How-to:

Assemble the dresser using the instructions provided, but don't mount the drawers into the dresser {the dresser comes with small plastic pieces to keep the drawers from coming out all the way, don't put those in until the dresser is finished}

Lightly sand the dresser with a sanding block and clean off the dust. 

Paint the outside of the dresser and drawer fronts. It took only 2 coats of paint using the Aura paint. I didn't prime because the paint I used has a "built-in" primer. If you use other paint you will want to prime as the surface is raw wood.


When paint is dry, you can start the gilding process on the drawer fronts. 


You will want to do this in an area that is easy to clean up as you will get silver dust everywhere.


Paint on a good layer of gilding size, following the directions on the bottle. I let the size dry until it was tacky to the touch and turned clear.

{I didn't take any photos of this process as there was silver leaf dust everywhere didn't want it to get into the camera lens and was in a hurry}

But here are photos of a lamp I gilded, the process is the same.


Now adhere the silver leaf using a brush to pick up the leaf, slightly overlapping each piece. Smooth each piece with a brush, brushing away the loose bits.

Silver leaf is very forgiving. If you missed a spot you can take a little piece of leaf and just smooth it in with your fingers.


After all the drawers fronts are done, paint on varathane to seal the silver finish. I painted 3 coats to give it a durable finish. I also gave the top and sides

{Also didn't take photos - was in hurry to get this finished}


Once dry, add knobs of your choice. I used these crystal knobs from Home Depot. At $6 each, they ended up costing more than the dresser itself but so worth it as they add that extra touch of bling!


Voila!


Happy gilding!

If you have any questions, feel free to comment or email me:
barbaras.hodgepodge@yahoo.ca

XOXO Barbara


*Dec 23:linking to: SNS@Funky Junk Interiors

Monday, November 29, 2010

{a silver leaf dresser: an ikea rast hack}

My teen daughter's room is finally coming together.

The latest improvement to her room is a new side table dresser. It is my version of an Ikea Rast hack. My inspiration was this photo from the September issue of Chatelaine magazine {another great Canadian publication}


I loved the bevel mirrored chest of drawers, which was from Ethan Allen. Wanting to replicate the look I called around for prices on custom cut mirrors. What I found was that most places charge a minimum fee per piece cut, around $40 a piece, then charge $5 per hole, which meant it would cost me $150. The Rast dresser was only $29, so $150 was too much. My daughter also thought the mirrors would be hard to keep clean, she didn't want to be constantly shining them.

Good point.

Glad I consulted with the client.

Instead I used a coat of black paint, silver leaf and crystal knobs to give it the glam it needed.

 The Rast dresser went from this:


to this:


My cost:
Rast dresser from Ikea: $29
black paint {Benjamin Moore Aura paint}: free {leftover}
silver leaf: $7 with 50% off coupon from Michaels
sizing medium: free {leftover from silver leaf lamp project}
crystal knobs: $6 each from Home Depot
Wipe-on poly: free {leftover from previous projects}

Total:$72


I am thrilled with the look. My daughter is glad that her room is finally getting the finishing touches. 


Now I am waiting for the fabric that is on back order to come in so I can make her some drapes!